Showing posts with label cake. Show all posts

Saturday, 2 March 2013

[Stir & Bake] Steamed Mixed Fruitcake 蒸杂果蛋糕


This is an easy, alcohol free steamed fruit cake. You can just make the cake with a hand whisk or simply a spoon. Cake is soft and moist, tasted the best from day 2 onwards.

Steamed Mixed Fruitcake

Ingredients:
(A)
150g water
100g butter
90g brown sugar

(B)
300g mixed fruits*
Orange zest from 1 orange
*I used 150g raisin, 80h dried apricot, 35g dried cranberries and 25g glace cherries.

(C)
3 eggs (lightly beaten)

(D)
200g plain flour
1½ tsp double action baking powder (normal baking powder is fine)
½ tsp baking soda
½ tsp cinnamon powder

(E)
120g chopped walnut (pre-roasted)

   Method:
  1. Cook (A) at low heat until boiling. Add (B), mix well. Set aside to cool down completely.
  2. Add (C), mix well. Meanwhile, prepare steamer and start to boil water.
  3. Sieve in (D), mix till just incorporated.
  4. Fold in (E), mix well.
  5. Pour batter into greased and lined pan (I used 20cm round, you can use 23cm round or 20cm square). Steam on high heat for 90 mins (make sure there is enough water in the steamer, if need to add water must only use hot water).
Tips:


Wrap the cover with cloth to prevent water from dripping on the cake if you are not using bamboo steamer.


Thursday, 7 February 2013

No-Bake Cheesecake

No-Bake Cheesecake01


No-Bake Cheesecake (Printable recipe)
By Christine's Recipes
Prep time: 5 mins
Cook time: 15 mins + 5 hrs for chilling
Yield: one 17.5cm loose-based square tin

Ingredients:
  • 110 gm digestive biscuits
  • 70 gm butter, melted
  • 250 gm cream cheese block
  • 50 gm caster sugar
  • 1/2 tsp vanilla extract
  • 1/2 tsp lemon juice
  • 200 ml whipping cream
  • fresh mango slices, for garnish
How To Make No-Baked Cheesecake01


How To Make No-Baked Cheesecake02

Method:
  1. Put the digestive biscuits in a sealed plastic bag. Crush to crumbs with a rolling pin. Transfer the crumbs to a bowl. Pour over the melted butter. Combine well. Place them into the tin and press firmly with the bottom of a cup to create an even layer. You might need a spoon or spatula to help when pressing for the 4 corners of the tin.
  2. In a large mixing bowl, beat the cream cheese, sugar, lemon juice and vanilla extract with an electric mixer until smooth.
  3. Use another mixing bowl, beat the whipping cream until fluffy and smooth. Stir into the cream cheese mixture and combine well.
  4. Spoon the mixture onto the biscuit base. Use a spatula to level the surface. You might like to smooth the top of the cheesecake with the back of a spoon damped with water. Chill in freezer for at least 5 hours, or until completely set. Transfer it into fridge for about 2 hours before serving. Slice into pieces and garnish with fresh mango slices, or any fruits in season.
 

Notes:
  • You can use either unsalted or regular butter.
  • To get a very smooth surface of your cheesecake, try to use a damped spoon for the final touch, as the cream cheese mixture tends to stick to the spatula.


Read more: http://en.christinesrecipes.com/2013/01/no-bake-cheesecake.html#ixzz2KDuZyNRH


Monday, 28 January 2013

Orange Lapis Surabaya Cake (Spiku)


What you need:
(below is half recipe I made with a slight modification)

Orange layers (makes two):
10 egg yolks (I used medium size)
70g caster sugar
35g plain flour
8g corn flour
8g full cream milk powder
125g butter
1 tbsp freshly squeezed orange juice
1/2 tsp orange zest
1 tbsp sweet condensed milk
1/2 tsp orange essence (optional)

Chocolate layer (makes one):
5 egg yolks
50g caster sugar
15g plain flour
10g cocoa powder
65g butter
1/2 tbsp sweet condensed milk
1 tsp chocolate paste

Filling:
strawberries jam

Method:

Grease pan, line and grease again. Set aside

To make the orange layers:
  1. Beat butter til smooth. Add in orange juice and sweet condensed milk, beat well. Add in orange zest, mix well
  2. Beat egg yolks and caster sugar til tibbon stage
  3. Fold in sieved plain flour, milk powder and corn flour
  4. Pour egg yolk mixture into the butter mixture, gently mix with spatula til well incorporated
  5. Pour into 2 pans, and bake in preheated oven of 180degC for 18 minutes til cooked (when the skewer comes out clean)

Do the same for the chocolate layer

To assembly:

When the cakes are cooled, place one orange layer and spread the top with jam, top with chocolate layer
Spread the top of chocolate layer with jam, top with the other orange layer
Cut and serve


Saturday, 26 January 2013

Hokkaido chiffon cupcakes 北海道牛奶蛋糕

Hokkaido chiffon cupcakes 北海道牛奶蛋糕  


Hokkaido chiffon cupcakes 北海道牛奶蛋糕
(recipe source: adapted from Forbidden Garden with minor changes)
*makes 9 cupcakes

Chiffon cake
IMG_1056 copyHokkaido chiffon cupcakes 北海道牛奶蛋糕 3 egg yolks
20g sugar
35g corn oil
60g milk
70g cake flour

3 egg whites
25g sugar

Filling
60g dairy whipping cream
10g sugar
1tsp instant custard powder

Icing sugar, for dusting

Method
1. Pre-heat oven to 170C.
2. Arrange paper liners on baking tray.
3. Hand whisk egg yolk and sugar till pale in colour.
4. Add in corn oil and milk, mix well.
5. Sift in cake flour, stir to combine.
6. Beat egg white until foamy, gradually add sugar, and continue beat till soft peak form.
7. Take 1/3 of egg white and use a hand whisk to mix into egg yolk batter.
8. Fold in the balance egg white with a spatula till well combine.
9. Scoop batter into pre-arranged paper liners to about ¾ full.
10. Bake for 20-25 mins at middle rack.
11. Beat whipping cream with sugar till firm and stiff (over a bowl of iced water).
12. Add in custard powder, mix well.
13. Pipe custard cream into cupcake and dust with icing sugar. Refrigerated before consume.
 
 http://nasilemaklover.blogspot.sg/2012/04/hokkaido-chiffon-cupcakes.html


Saturday, 19 January 2013

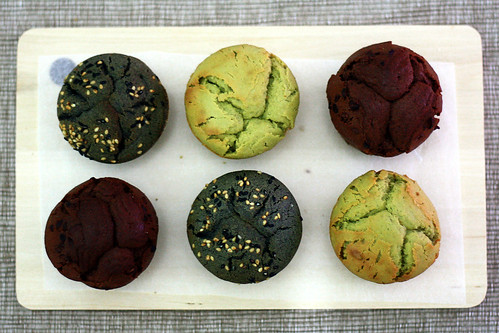
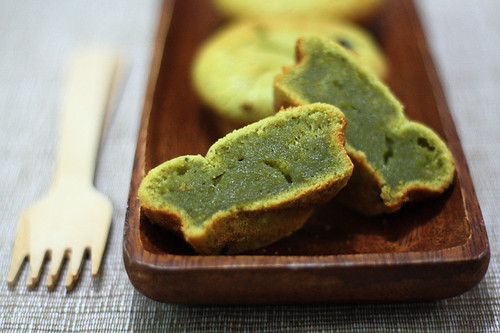
Matcha Mochi Cakes


Matcha Mochi CakesAdapted from Lemonpi

Makes around 12 cupcake-sized mini cakes
Ingredients
220g mochiko [Thai glutinous rice flour]
5g matcha powder
85g unsalted butter, melted
155g caster sugar
187g evaporated milk
2 eggs
1 teaspoon baking powder
Cooked red beans (possibly canned, see below) (optional)
Method
1. Preheat the oven to 175C. Grease and flour a cupcake pan.
2. Sift the mochiko, matcha and baking powder together.
3. In an electric mixer, whisk the eggs and sugar until light and fluffy. Fold in the melted butter, then the evaporated milk. Fold in the dry ingredients. (Note: I tried to fold the ingredients in, but it just wouldn't mix so I just used the mixer to get everything together)
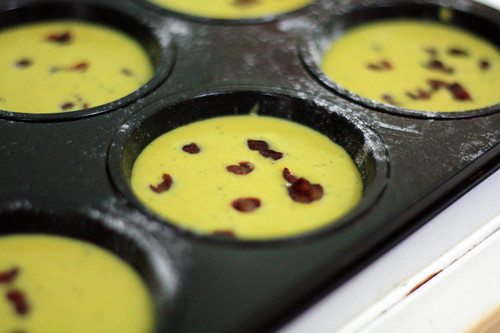
4. Split the batter between 12 cupcake holes, using around 1/4 cup per cake. If using red beans, gently dot them on, using around 1 tsp per cake. No need to push them down, they will sink themselves.
5. Bake for 20 – 25 minutes or until a skewer inserted into the middle comes out clean. Cool the cake on a rack, then remove from the pan.
If served warm from the oven, the cakes also have a slightly crunchy crust and taste even better!


Black Sesame Variation: Omit matcha powder and red beans from above recipe. Add in 30g Black sesame paste in with the evaporated milk, and 1-2tbsp ground black sesame seeds in with the dry ingredients. Sprinkle with toasted black and white sesame seeds before baking.

Chocolate Variation: Omit matcha powder and red beans from above recipe. Use 200g mochiko, and add in 25g cocoa powder. Fold in/sprinkle on cacao nibs or mini chocolate chips if desired.

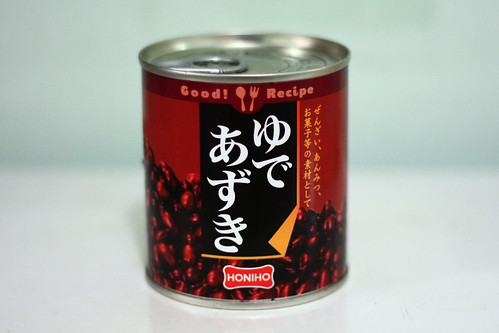
Red beans
These canned red beans, which are cooked beforehand so they are slightly 'saucy' straight from the can. To use in these cakes, gently rinse them in a sieve and let them drip dry. Pat them dry with a paper towel, and toss with around 1/2-1 tsp of the glutinous flour (this prevents them from sinking straight to the bottom and sticking to the pan) If you don't like red beans, mini chocolate chips will also be a good pairing with the matcha.
 
 
http://mybutteryfingers.blogspot.sg/2010/03/matcha-mochi-cakes.html


Avocado Pound cake

Avocado butter cake

Avocado Pound cake(recipe source: adapted from Joy of baker with minor changes)

*makes a loaf pan
Ingredients
Flesh of 1 Avocado
50ml milk

125g butter, softened
150g sugar
1/2tsp vanilla extra

2 eggs

200g cake flour
40g Polenta (fine corn meal)
1/2tsp baking powder
1/2tsp baking soda
1/4tsp salt

Method
1. Blend avocado flesh together with milk, set aside.
2. Beat butter, sugar and vanilla until light and creamy.
3. Add in eggs one at a time, beating well after each addition.
4. Put in avocado milk mixture, combine well.
5. Add in flour, Polenta, baking powder, baking soda and salt, mix well.
6. Bake in a pre-heated oven at 180c for 45 minutes or until done when tested with a skewer.

http://nasilemaklover.blogspot.sg/2011/04/avocado-pound-cake.html


Rich chocolate sponge cake

Rich chocolate sponge cake

Rich chocolate sponge cake (recipe source: adapted from 羿溱 , original recipe from 美味糕点新主张)


Ingredients
Rich chocolate sponge cake 50g corn oil
80g full cream milk
15g cocoa powder
100g semi-sweet chocolate (I use Lindt 70% cocoa)
90g egg yolks (5 medium eggs)

180g egg white (5 medium eggs)
100g caster sugar
75g cake flour

Ganache glaze
150g dairy whipping cream
120g semi-sweet chocolate
12g butter

Method
1. Heat corn oil and milk over a pot of simmering water.
2. Add in chocolate, and stir till melted.
3. Add in cocoa powder, stir well. Add in egg yolks once slightly cooled.
4. In another clean bowl, beat egg whites on high speed until foamy, gradually add in sugar and beat till glossy and soft peaks form.
5. Take one-third of egg whites mixture to mix with the egg yolk chocolate mixture using a hand whisk. Then fold in the remaining egg white using a spatula until well combined.
6. Sift in the flour, slowly fold well.
7. Pour batter into a 7” round cake pan with removable base.
8. Bake at pre-heated oven at 180c for 40mins.
9. Immediately inverted the cake pan and cool on a wire rack.
10. Make ganache by melt chocolate over simmering water, add in cream and butter, stir well till smooth.
11. Pour ganache over the cake and refrigerate in the fridge before serve.

ganache amount in this recipe was quite too much, maybe reduce 20% should be alright.


http://nasilemaklover.blogspot.sg/2011/08/rich-chocolate-sponge-cake.html


Basic Chocolate Sponge Cake


A simple basic sponge cake using chiffon cake method..
Basic Chocolate Sponge Cake
(recipe source: adapted from 妙手烘培)
*make a 7” round cake (with removable bottom cake pan)

Ingredients
4 egg yolks (large)

20g caster sugar
50g corn oil
60g milk
15g cocoa powder
1/2tsp chocolate emulco,optional
75g cake flour

4 egg white (large)

1/4tsp lemon juices or 1/4tsp cream of Tartar
60g caster sugar

Method

1. Lightly whisk egg yolk with sugar.
IMG_6360

2. Add in corn oil, stir to combine.
IMG_6361

3. Add in milk, stir to combine,then add in cocoa powder, mix well.
IMG_6362

4. Add in cake flour, mix well, set aside.
IMG_6363

IMG_6364

5. Add lemon juices into egg white, beat till foamy. 
6. Gradually add in sugar, beat till stiff peaks (十分发 / 硬性发泡)
IMG_6367

7. Take 1/3 portion of egg white mixture and use hand whisk to mix with egg yolk mixture till light.
IMG_6368

8. Fold the balance of egg white mixture into egg yolk mixture using a spatula, combine well.
IMG_6369

9. Pour batter into the pan (do not need to line with baking paper and do not use a non-stick pan), bake at pre-heated oven at 140c for 25mins (at lower rack), then increase to 170C and continue to bake for 25mins.  
Remove cake from oven and cool on a wire rack (don't need to invert the cake). Once cake is slightly cool down(10-15mins), remove cake from cake tin (use a think and flat spatula to run around the side and bottom of the cake pan) and let it cool completely on a wire rack.
IMG_6370

IMG_6371


*if you want to make a normal vanilla sponge cake, replace chocolate emulco with vanilla essence, and omit cocoa powder and add back 15g of cake flour to become 90g cake flour.

 
http://nasilemaklover.blogspot.sg/2012/08/basic-sponge-cake-1.html


Basic Plain Sponge Cake


after removed from the oven

IMG_7165

no major shrinkage once cooled..
IMG_7166

Easy to remove from the pan also, i even just use bare hands to remove the bottom..
IMG_7171


Basic Plain Sponge Cake
(recipe source: by Sonia aka Nasi Lemak Lover)
*make a 7” round cake (with removable bottom cake pan)

4 egg yolks (large)
20g caster sugar
50g corn oil
60g milk
1/2tsp vanilla extract ( I use Cointreau )
90g cake flour

4 egg white (large)
1/4tsp lemon juices or 1/4tsp cream of tartar
60g caster sugar

Method
1. Lightly whisk egg yolk with sugar.
2. Add in corn oil and milk, stir to combine.
3. Add in cake flour, mix well, set aside.
4. Add lemon juices into egg white, beat till foamy.
5. Gradually add in sugar, beat till stiff peaks (十分发 / 硬性发泡)~ (hand mixer speed 3 takes about 5mins)
6. Take 1/3 portion of egg white mixture and use hand whisk to mix with egg yolk mixture till light.
7. Fold the balance of egg white mixture into egg yolk mixture, combine well.
8. Pour batter into the pan (don’t need to line with paper but you can also line paper but use normal baking paper, also don't use a non-stick pan), bake at pre-heated oven at 140c for 25mins (at lower rack), then increase to 170C (at lower rack) and continue to bake for 30mins.
 
http://nasilemaklover.blogspot.sg/2012/09/basic-plain-sponge-cake.html


Sarawak Black Cake (Kek Serikaya or Kek Hitam) 砂劳越黑蛋糕


IMG_3775

This is the gula hitam
IMG_9011

 
IMG_9016

Not sure why the batter became curdle..
IMG_9017

After mixed with flour, the batter become smooth, but the colour still not look dark at this stage..
IMG_9018

After steamed, cake colour changed to very dark. In order for this black cake look more attractive, i sprinkle with silver beads
 
IMG_3764

Sarawak Black Cake (Kek Serikaya or Kek Hitam) 砂劳越黑蛋糕
(recipe source: adapted from My Little Favourite DIY who adapted from Mrs EG, with minor changes)
*makes a 7” square cake

Ingredients173g unsalted butter
60g sugar
110g plain flour
4 eggs (large)
50g condense milk
60g Horlick
50g dairy whipping cream / nestle cream (1/2can)
90g kaya
70g gula hitam
1 tbsp unsweetened cocoa powder

Method
1. Grease and lined parchment paper on a 7" square baking tray. Allow extra parchment paper or baking paper over hang on both side of the baking tray.
2. Beat butter and sugar till pale. Add in egg one at a time, beating till each combine well.
3. Beat in condensed milk, whipping cream and kaya till well combine. Then add in gula hitam.
4. Fold in Horlick, cocoa powder and flour and mixed well.
5. Pour mixture into the prepared baking tray. Cover the cake loose with a piece of aluminium foil to prevent (condensation) water from dripping into the cake.
6. Steam over medium high heat for 2 hours in a steamer or wok. Do check water level regularly and replenish when necessary.


http://nasilemaklover.blogspot.sg/2012/12/sarawak-black-cake-kek-serikaya-or-kek.html


Monday, 14 January 2013

Steamed Moist Chocolate Cake

Steamed Moist Chocolate Cake


Chocolate Moist Cake4

 
Chocolate Moist Cake3


What you need:180 g butter
200 g caster sugar
200 g full cream evaporated milk
2 eggs, slightly beaten with fork
100 g plain flour
50 g cocoa powder
1/2 tsp baking powder
1/2 tsp baking soda
1/2 tsp vanilla extract or 1 tsp vanilla essense
2 tbsp of rum
(optional)

What to do!Combine caster sugar, evaporated milk, vanilla extract or essense and butter in a saucepan.
Stir over low heat until sugar is dissolved and butter is melted, turn off the fire and keep warm.
Add the beaten eggs into the slightly cold evaporated milk mixture and stir till well mix.
Sift the flour, cocoa powder, baking powder and baking soda into a large mixing bowl, then pour the eggs mixture over the flour and stir till well mix (cake batter should be runny)
Heat up the steamer.
Lined and greased a 8 or 9 inch round baking pan.
Pour the batter into the lined pan and place the pan into the steamer and cover the top of the pan loosely with a piece of aluminium foil.
Cover the steamer and steam over medium heat for 45 mins.
Cool the cake in pan before turning out for further decoration.


Chocolate Fudge Topping
200 g condense milk
1/2 tsp vanilla extract or 1 tsp vanilla essense
2 tbsp corn oil
20 g cocoa powder, sifted
a pinch of salt

Combine the sifted cocoa powder, condense milk and oil.
Stir over low heat till thicken.
Add in salt and vanilla extract or essense.
Cool the chocolate topping a little before spreading on the cake.
Refrigerated before serve it.


Notes:
1. The sweetness of this cake are just nice, not too sweet and it's very chocolatey taste.
2. I did not line the cake pan, but i greased the pan generously with butter.
3. Boil a kettle of water as stand-by while steaming the cake. This is to top up the water in the steamer if it dries up…(Optional, but useful…)